DIY Tiny Garden House - How to Make a Cute Tiny Garden House
Every bit spring approaches, nosotros're looking frontwards to spending more time exterior, especially in the garden. On elevation of regular gardening that should be on your list anyhow, we thought we'd make something cute like a tiny fairy garden business firm.
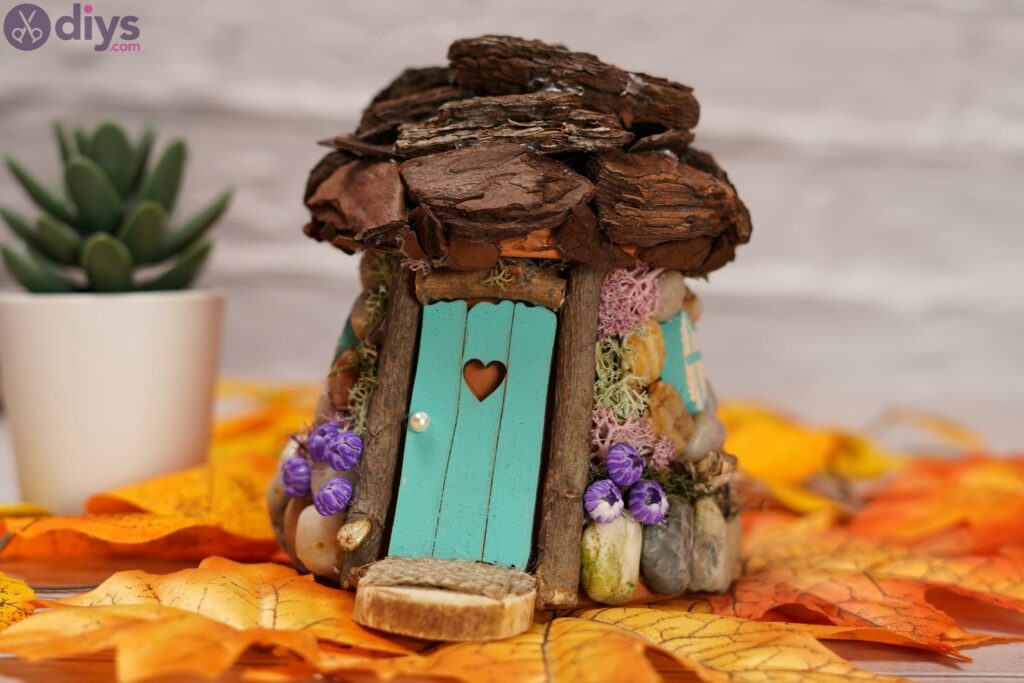
It's going to take a chip of your time, but it's going to be worth it as information technology looks amazing! Let's see how nosotros can brand one easily.
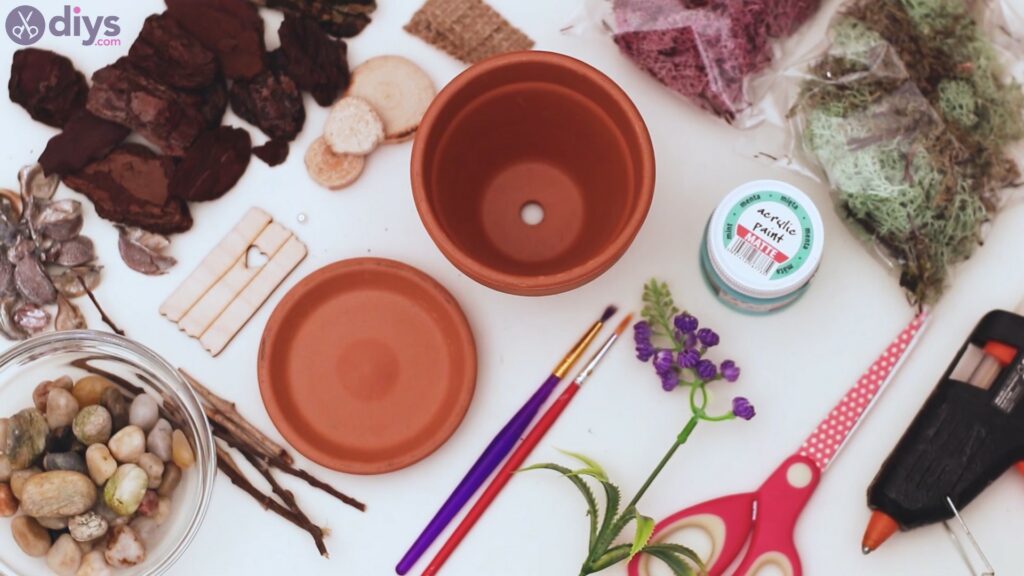
Materials for a fairy garden house
- moss
- tree bark
- pot
- small wood door
- bead
- forest slice
- jute ribbon
- branches
- rocks
- artificial flowers
- green acrylic paint
- paintbrush
- pair of scissors
- glue gun
How to make fairy garden houses from scratch
Do you have all your materials near you lot!? Nosotros know we don't like running around trying to notice something nosotros forgot, so we hope you have the unabridged list of materials on the work table. Let'due south begin!
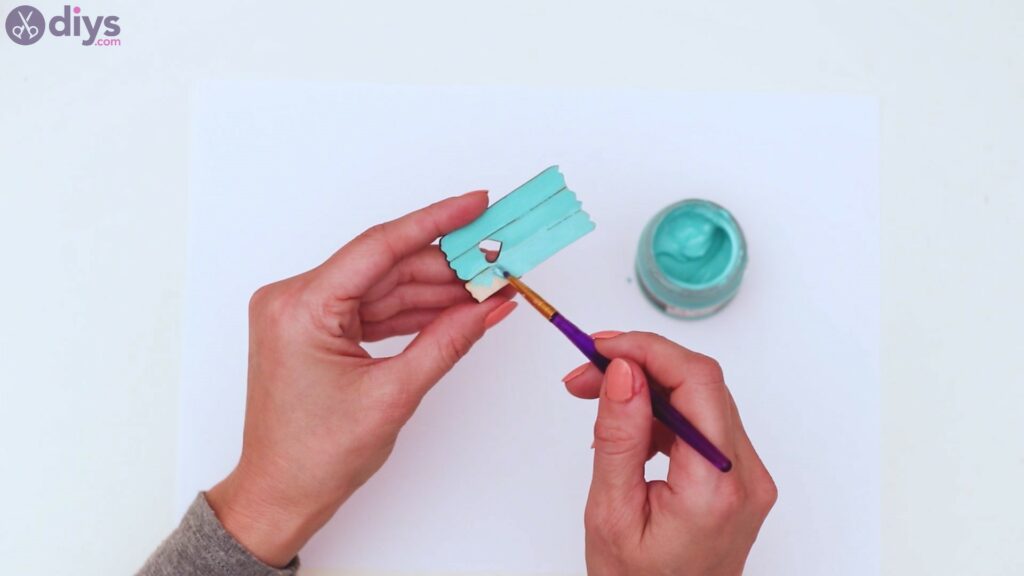
Footstep ane: Paint the door
We're starting the process with a unproblematic footstep – painting the wooden door. We plant one that'south absolutely adorable, but if you didn't get one that's similar to ours, you tin always build it yourself with a few popsicle sticks. Now, dorsum to our blueprint. Get the wood door, the green acrylic paint, and the paintbrush.
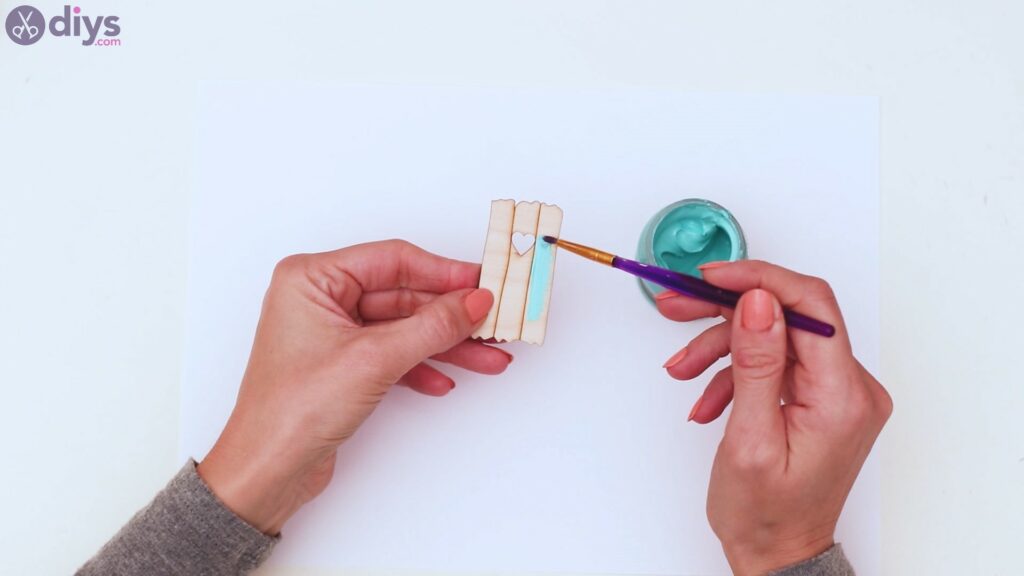
Paint the whole door with the pretty color and make sure you get all the nooks and crannies.
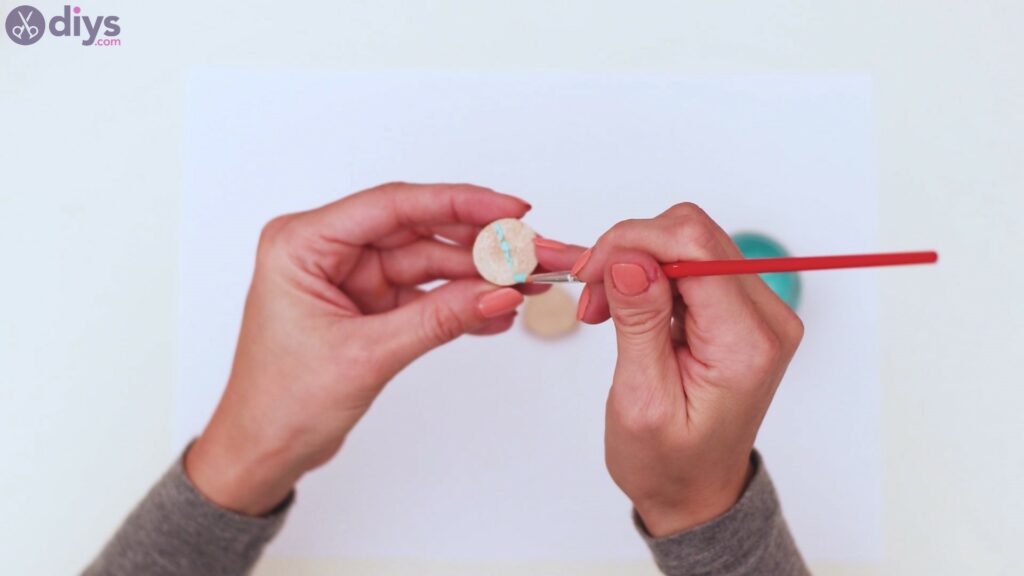
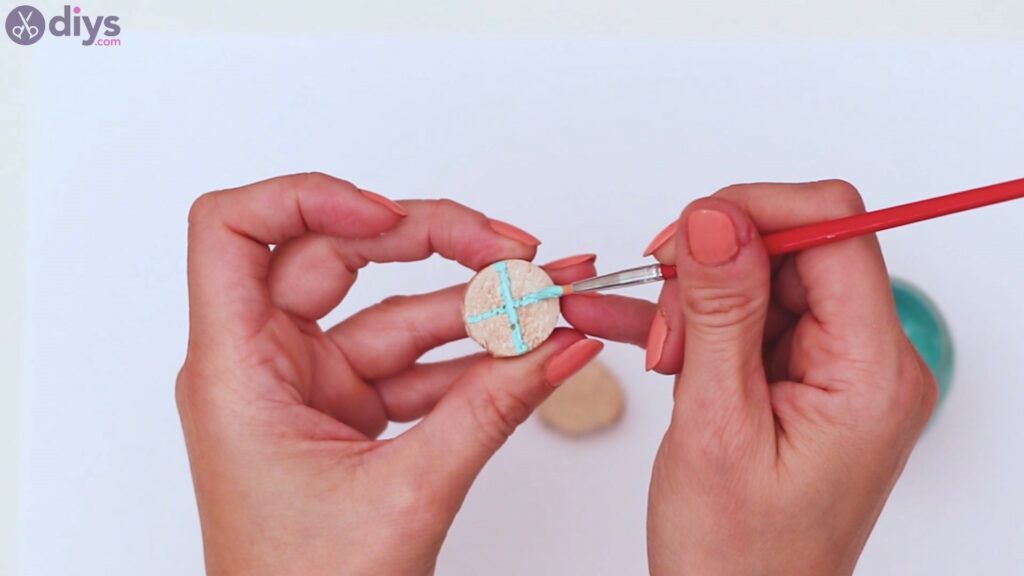
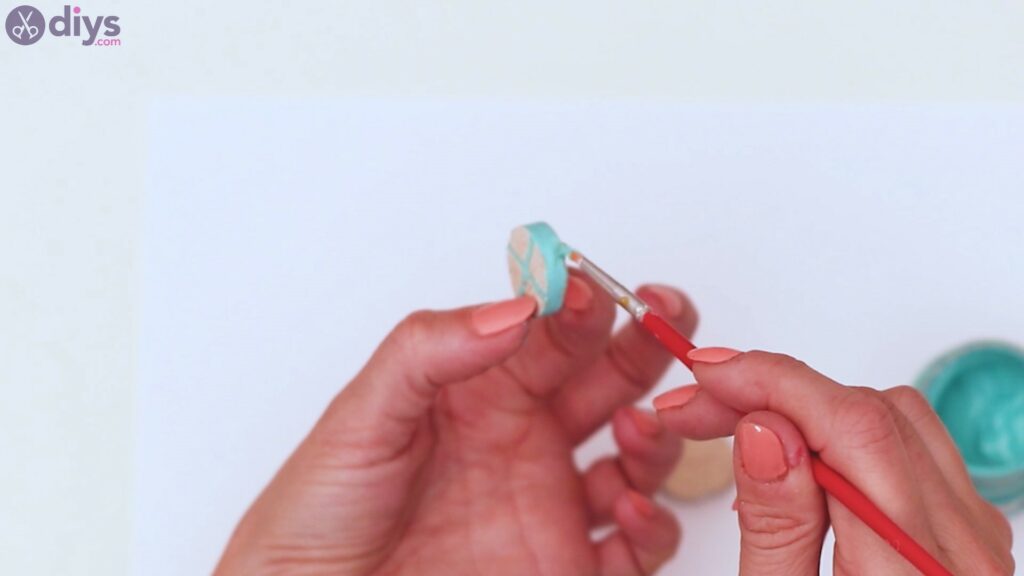
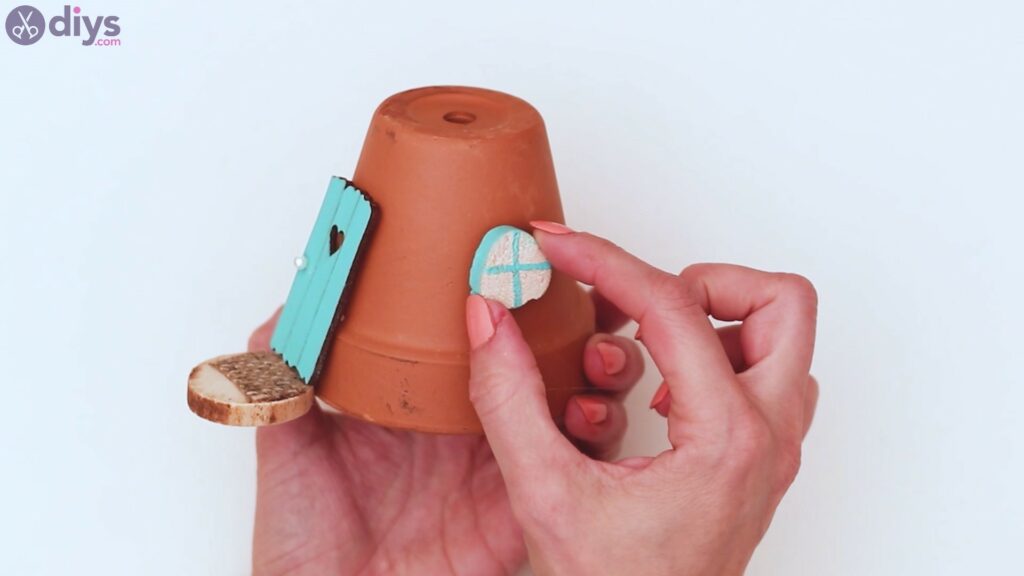
Pace two: Paint the wood slices
Since you already have the pigment can open up and the paintbrush in your mitt, get the woods slices and pigment those too. Nosotros chose to draw a plus sign and so comprehend the sides of the slice with color likewise. You want to create two of these, as they'll be your house'south windows.
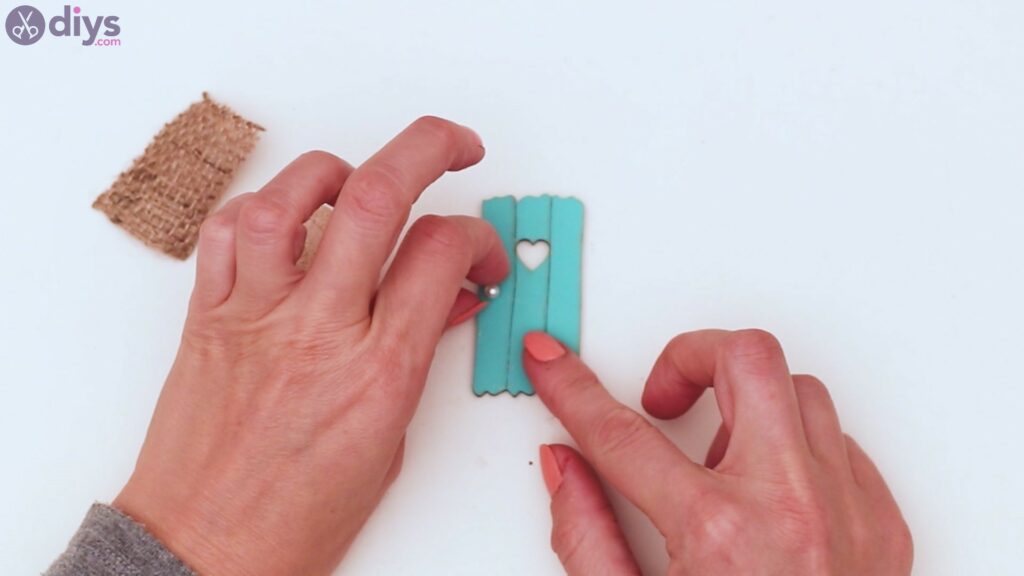
Step three: Glue the doorknob
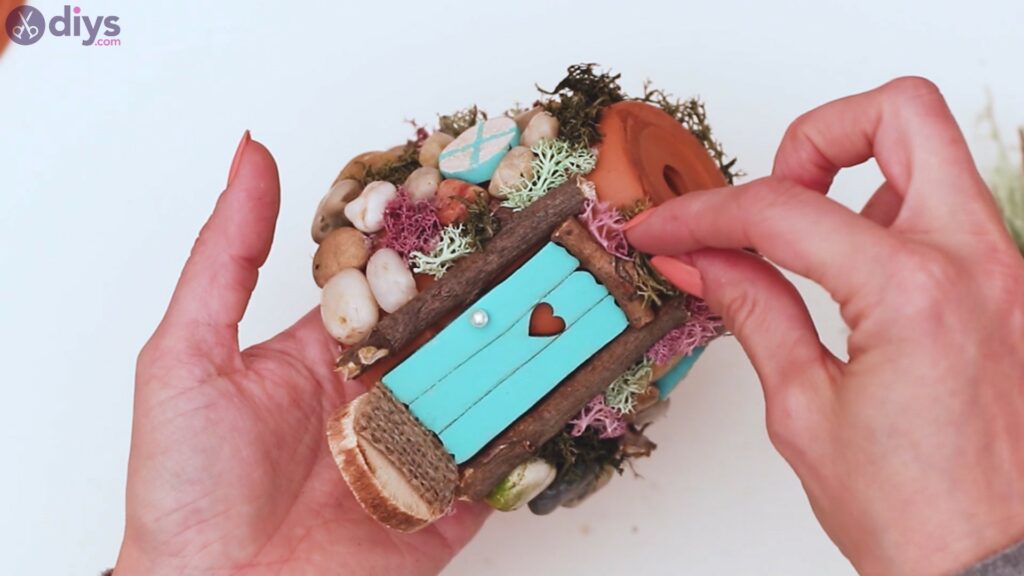
Now that the paint on the door has stale, it'southward time to add the "doorknob" Since our door is so tiny and cute, what ameliorate doorknob than a minor white bead, right? Get theglue gunand the bead,put some hot glue on the right spot on the door and add the bead.
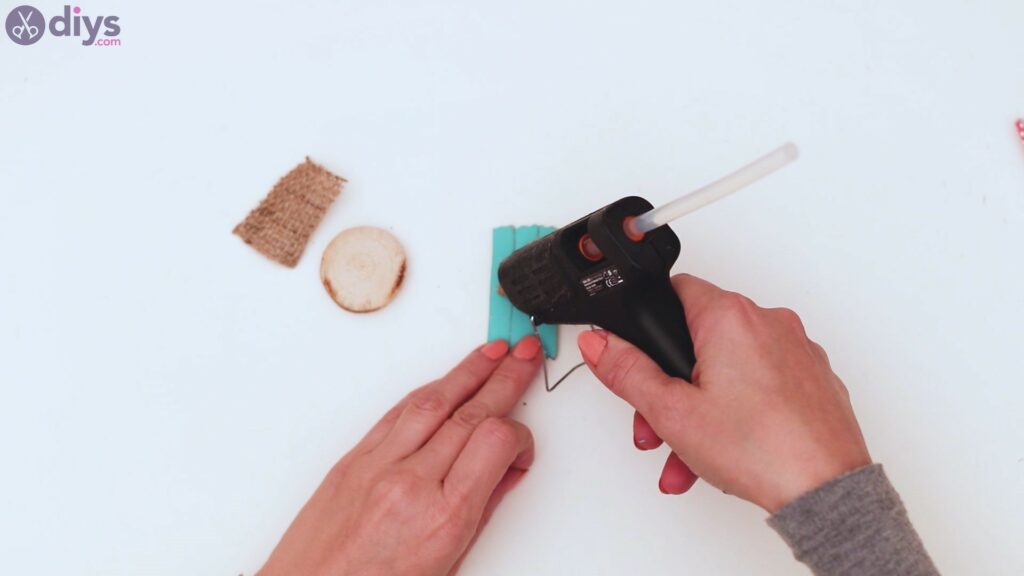
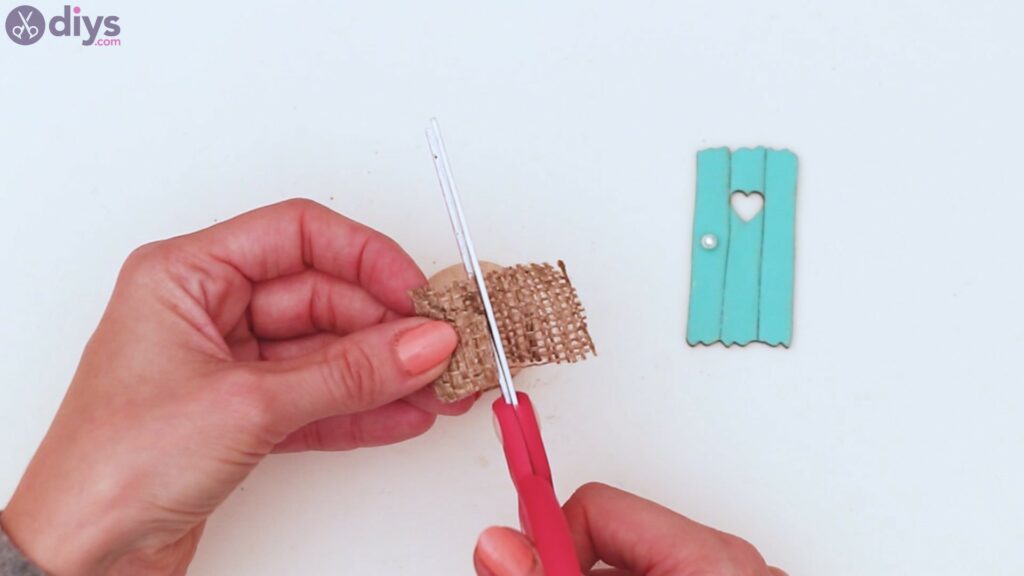
Step 4: Create a welcome mat
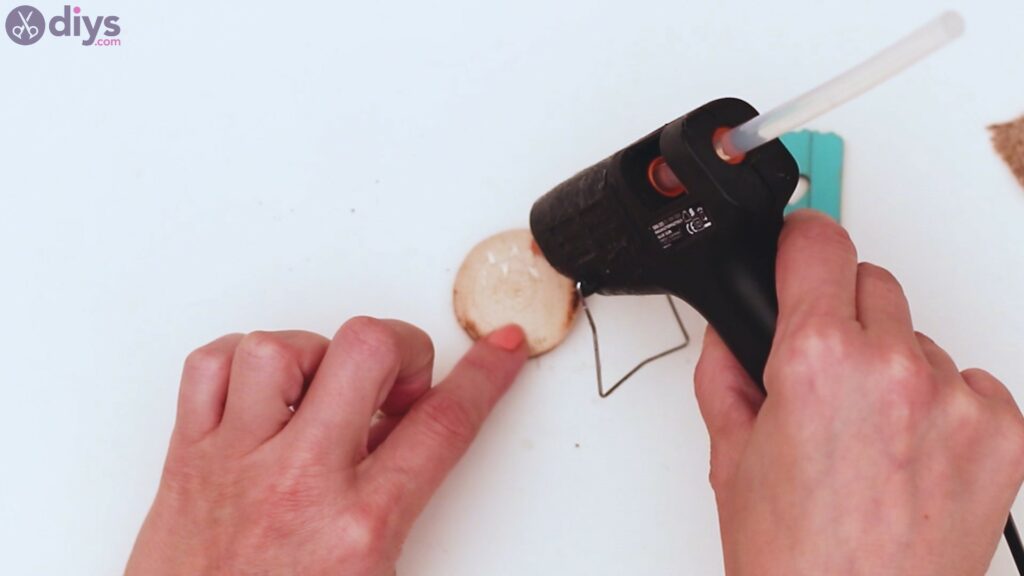
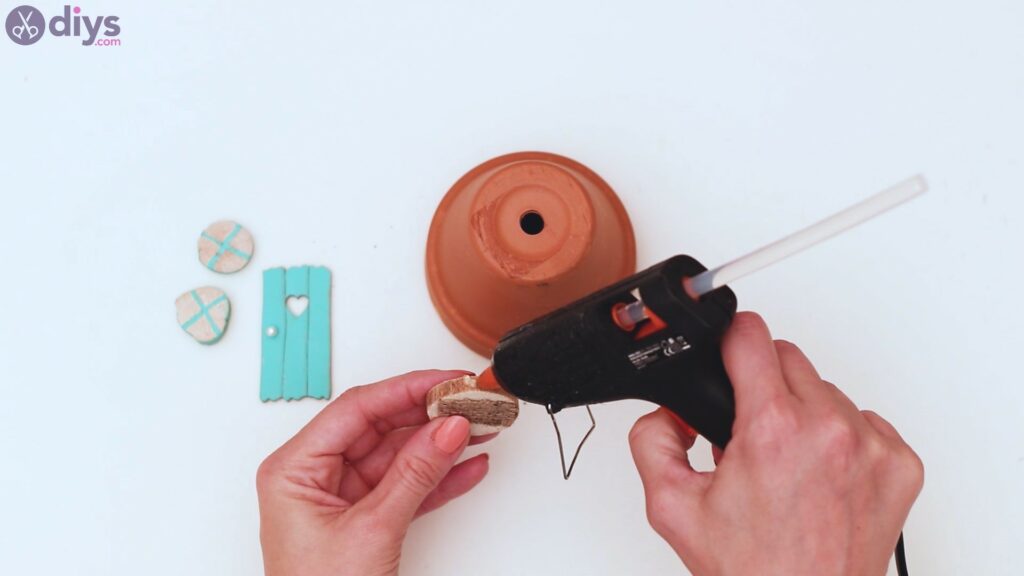
Every business firm needs a welcome mat, right? Well, let'southward make one, then! Get anotherwood slice and the jute ribbon. Cut a piece of jute ribbon with your pair of scissors – information technology needs to exist small-scale enough to fit over the wood slice yous just chose.
Add some hot glue over the wood piece and add the jute ribbon piece over information technology. Make sure you concord the pressure for a few seconds so the glue sets.
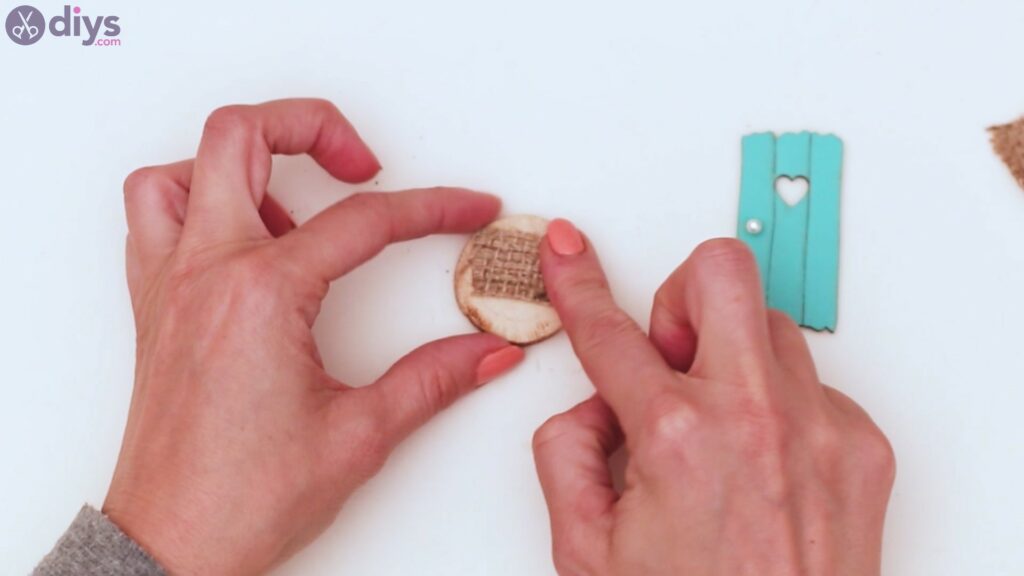
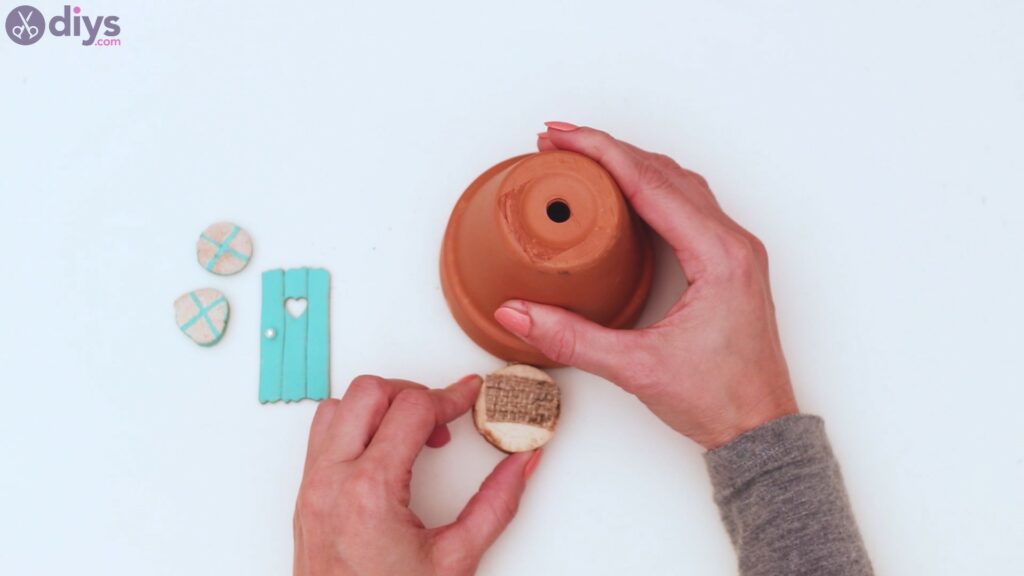
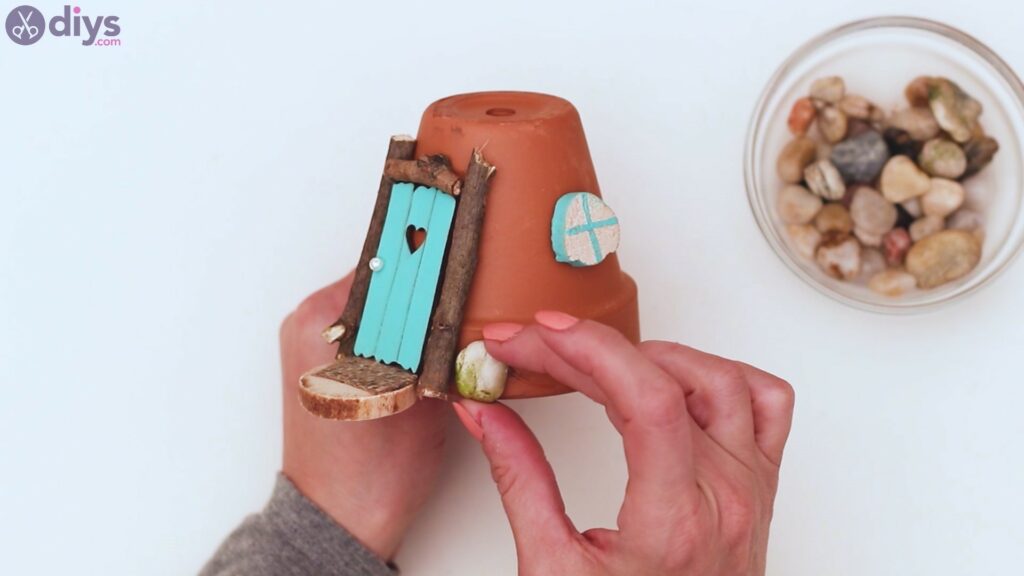
Step 5: Build the house
This beautiful wood slice nosotros just busy with the jute ribbon will act as a threshold for the firm. So, get the pot and place it upside downwardly – that'southward going to be your house. So, get theglue gun and add some hot glue to one side of the wood slice and attach it to the pot, right on the bottom ridge.
Then, add some more hot glue to the back of the pocket-size wooden door and attach it to the "house."
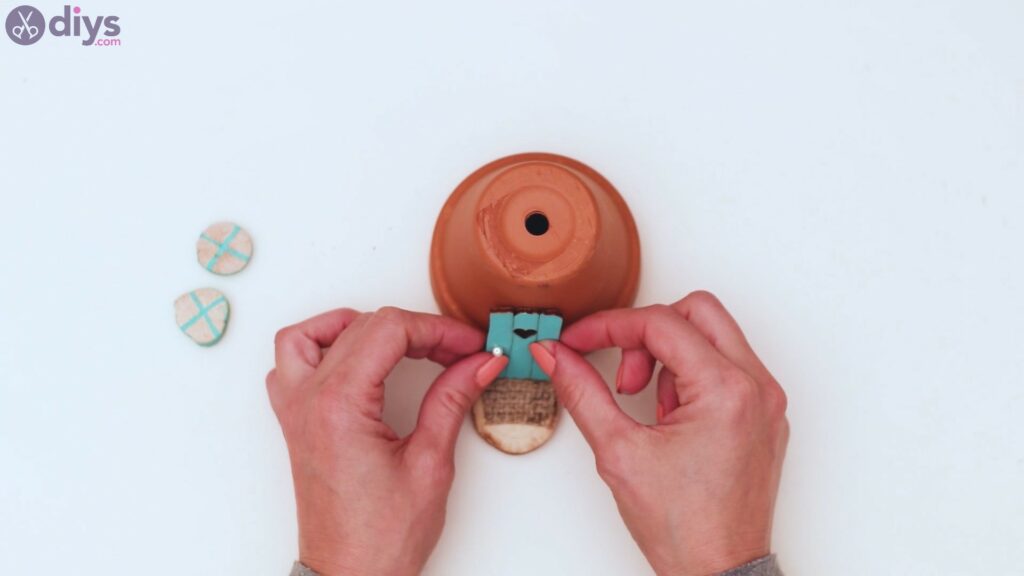
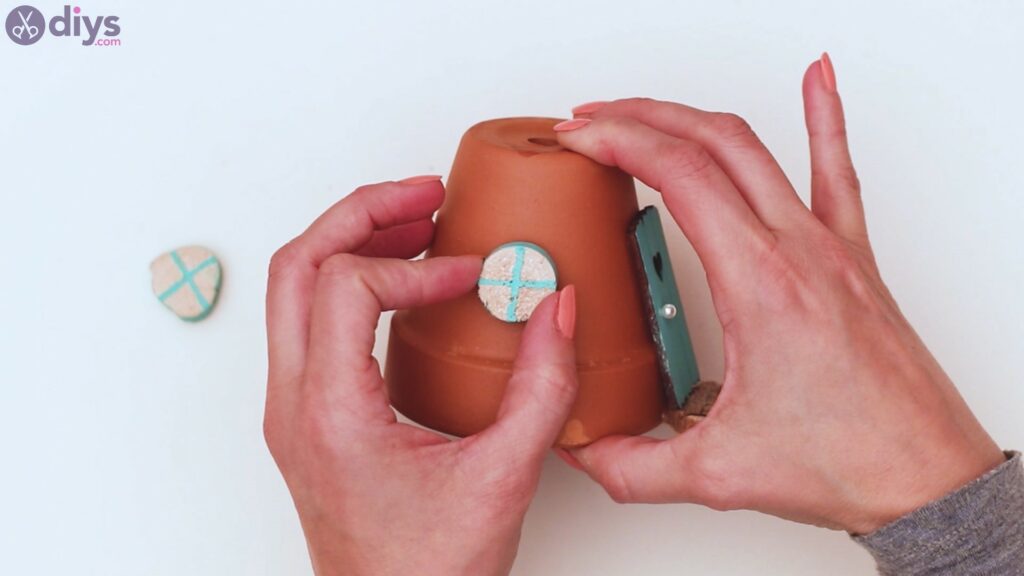
Adjacent, it's time you attach the windows. Add some hot glue to the back of the painted wood slices and attach them to the pot also. We put them some altitude away from the door, on either side of the pot.
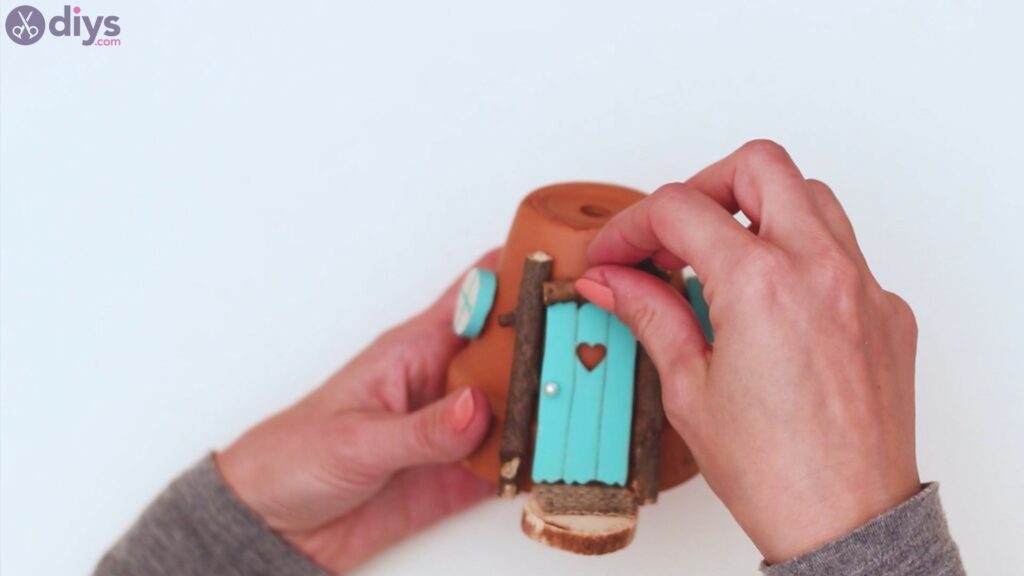
Step 6: Make the entrance
Every garden house needs to look whimsical, then let's make it so! Get the branches you accept on the table and the glue gun. Add hot glue to one of the branches and place it on i side of the door. So, repeat the process for the second co-operative.
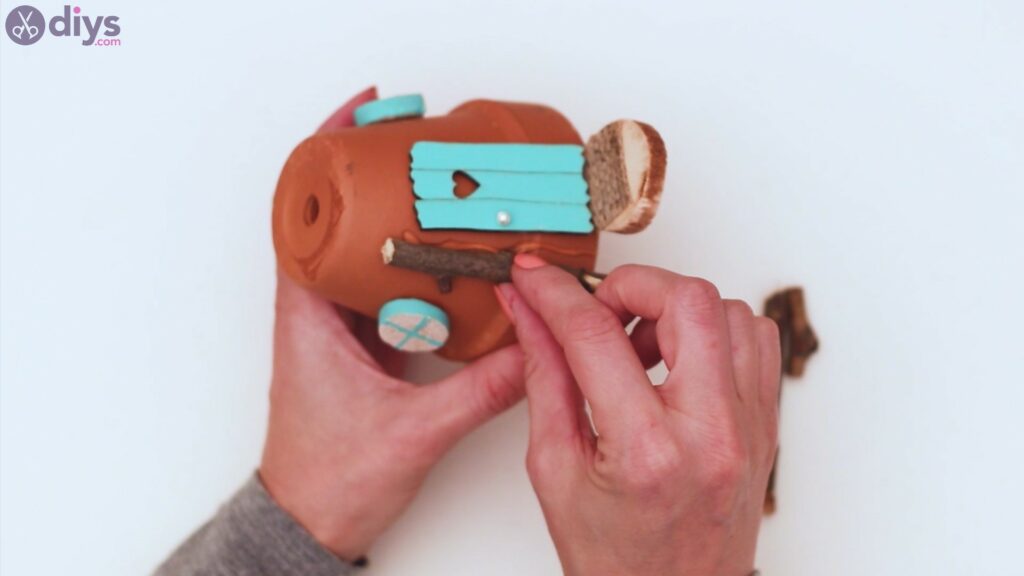
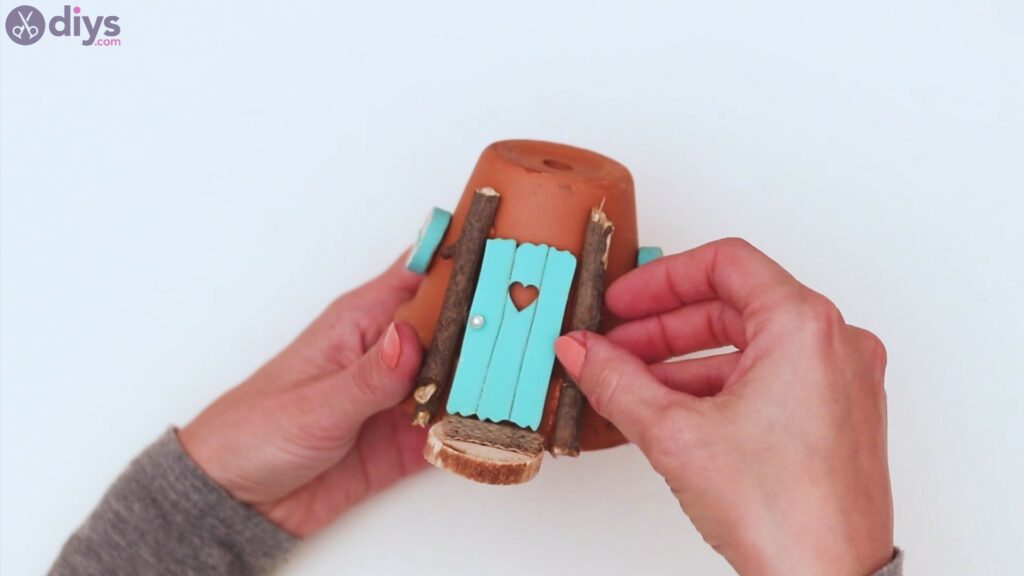
Become some other, smaller, slice of wood and add information technology on peak of the door, so the business firm at present looks similar information technology really has a doorway, not just a door.
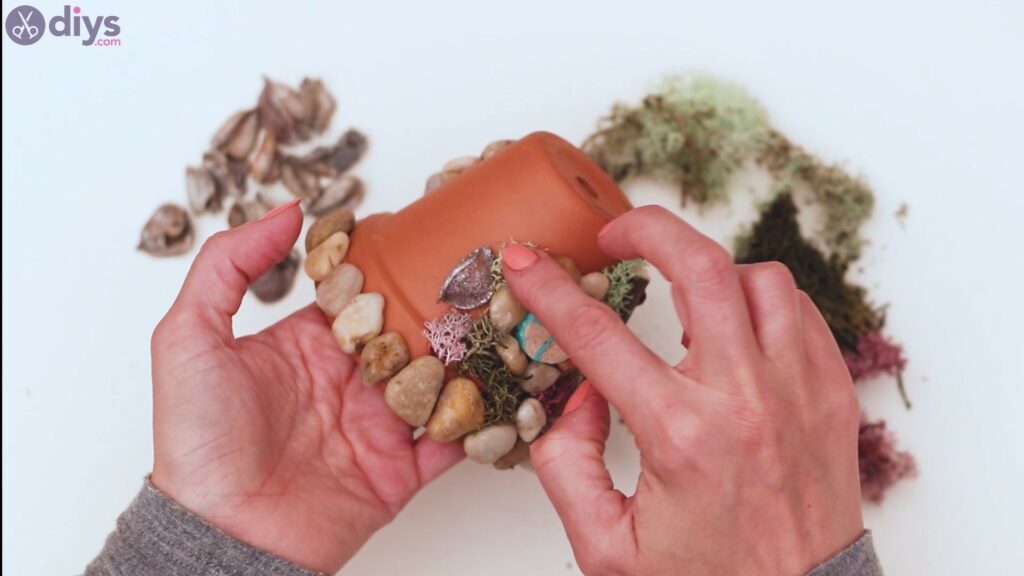
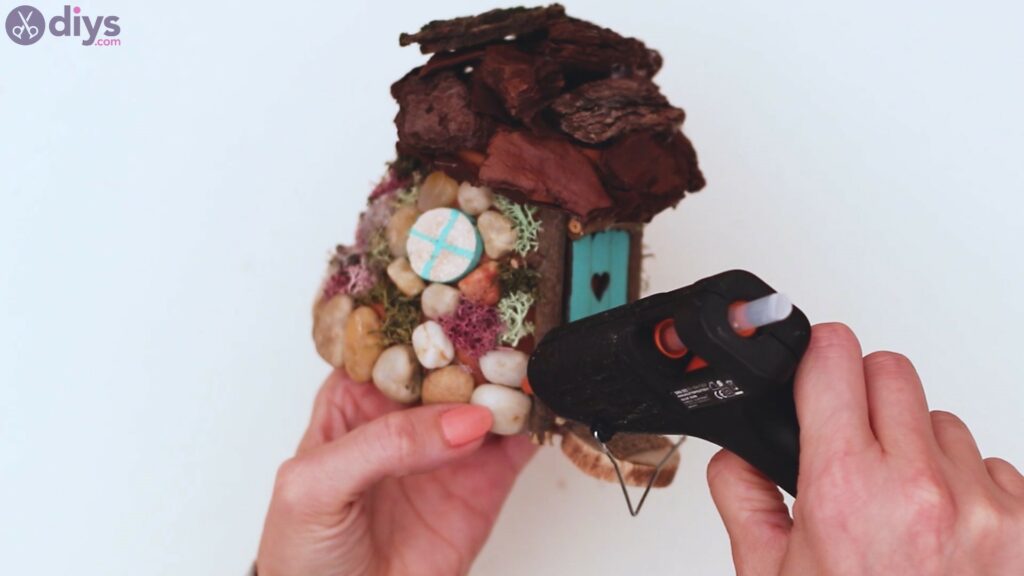
Step 7: Add the rocks
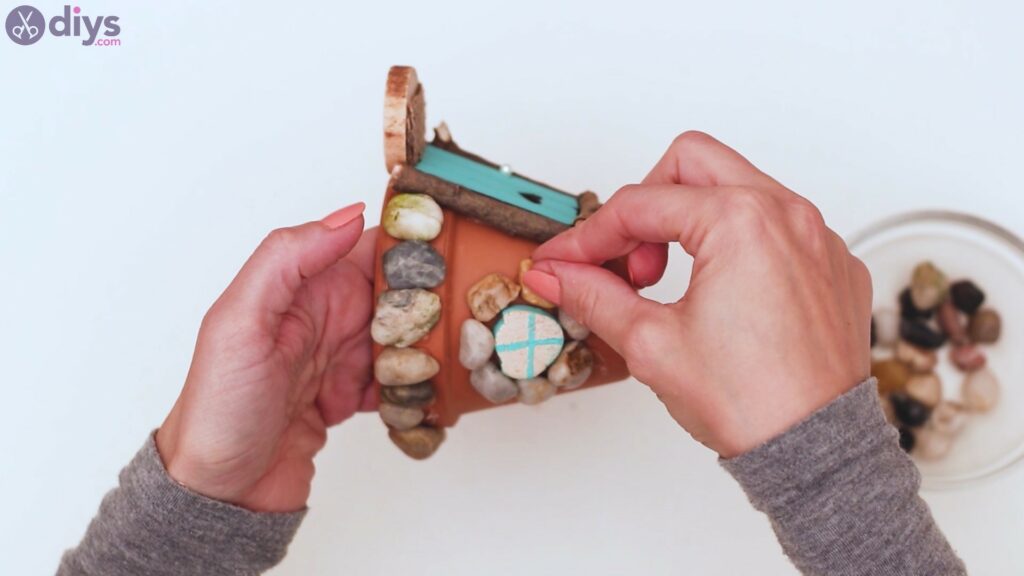
Now, information technology wouldn't be a natural-looking house if it didn't have some stonework, right? Well, let's become the rocks nosotros gathered and starting time adding them up. We propose y'all get for the rocks that have flatter ends, since they'll exist a lot easier to mucilage to the pot.
Add hot glue to each rock and starting time lining them on the bottom area of the pot. You want them to be arranged as close together as possible. Add rocks until you reach around the pot.
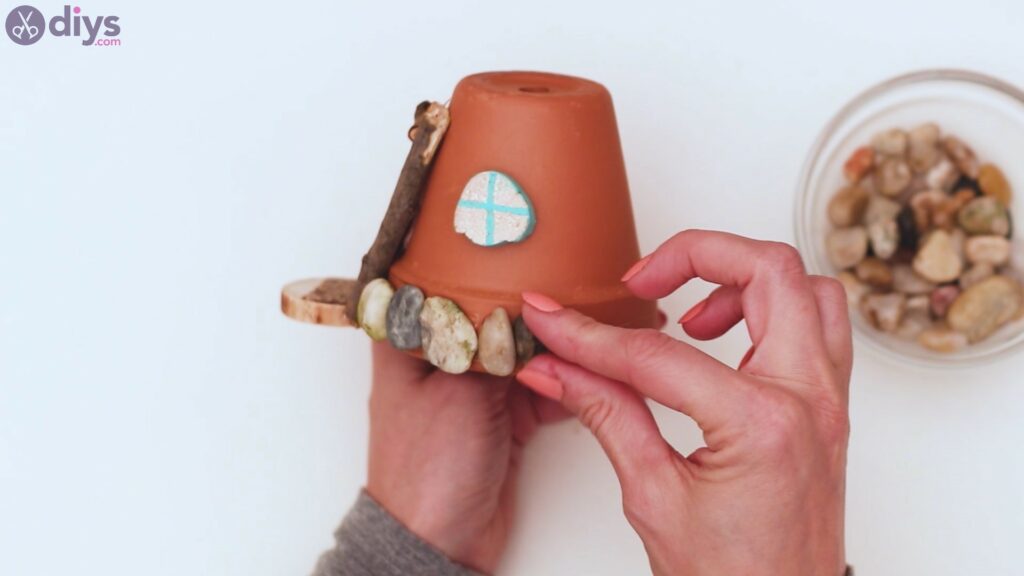
Then yous can go on with the rocks, but picking some of the smaller pebbles. Put some hot gum on them and add them around the forest slices representing the windows.
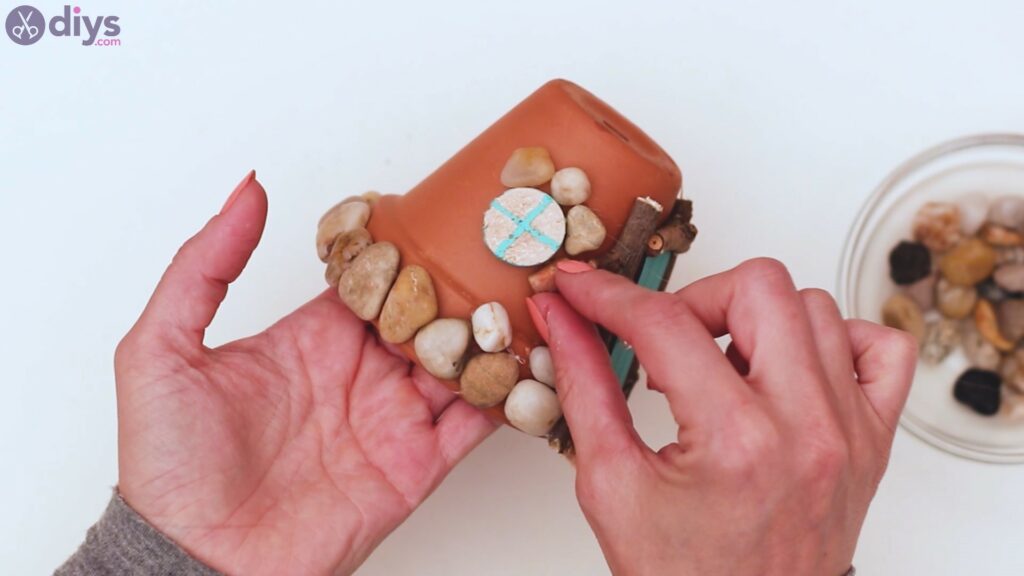
Do the same for the other window too!
Pace viii: Add together the moss and the metallic leaves
Now that you're done with the rocks, it'due south time we used the moss too! We have different colors for the moss and we want to mix things up a fleck. Add together some hot mucilage to the pot and press tufts of moss into the gum.

Add moss in the spots between the door and the windows, and around the rocks also. Add a few metallic leaves too, stringling them around the pot wherever you lot experience like information technology.
Add more moss so it covers all open spots across the pot. Make sure yous alternating the colors and then it looks nicer.
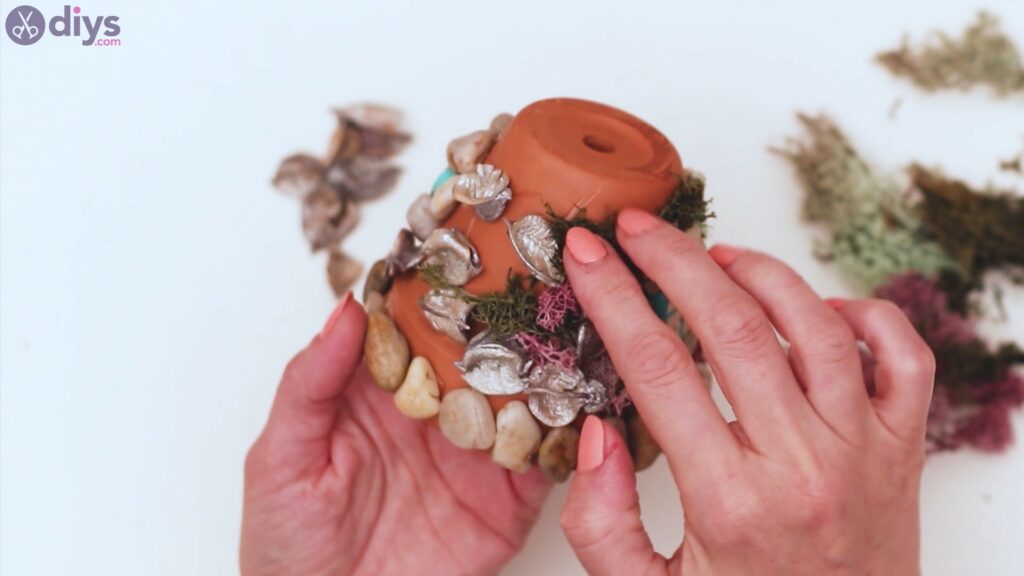
Make sure you add together moss above the door likewise!
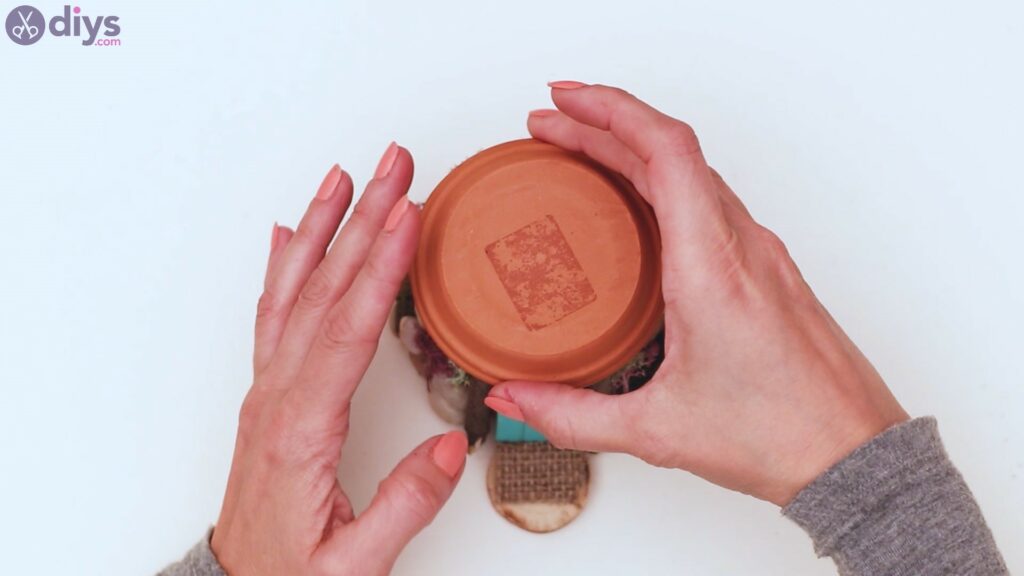
Step 9: Build the roof
Every house has a roof, even one that'south for the garden sprites. So, add some hot glue to the top of the pot and bring in the minor plate that came with your pot. Place it upside down on the pot and press it and so the glue sets better.
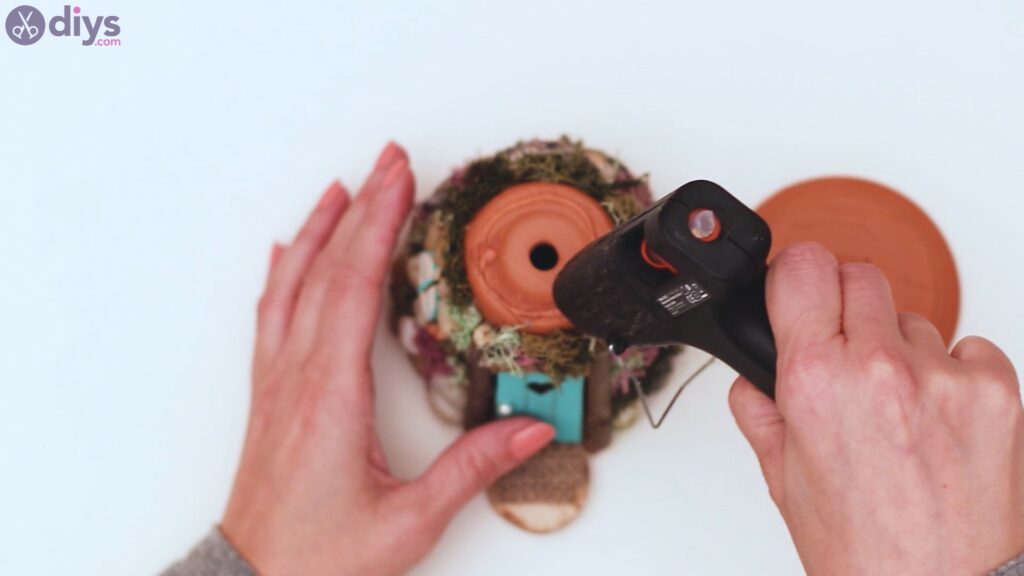
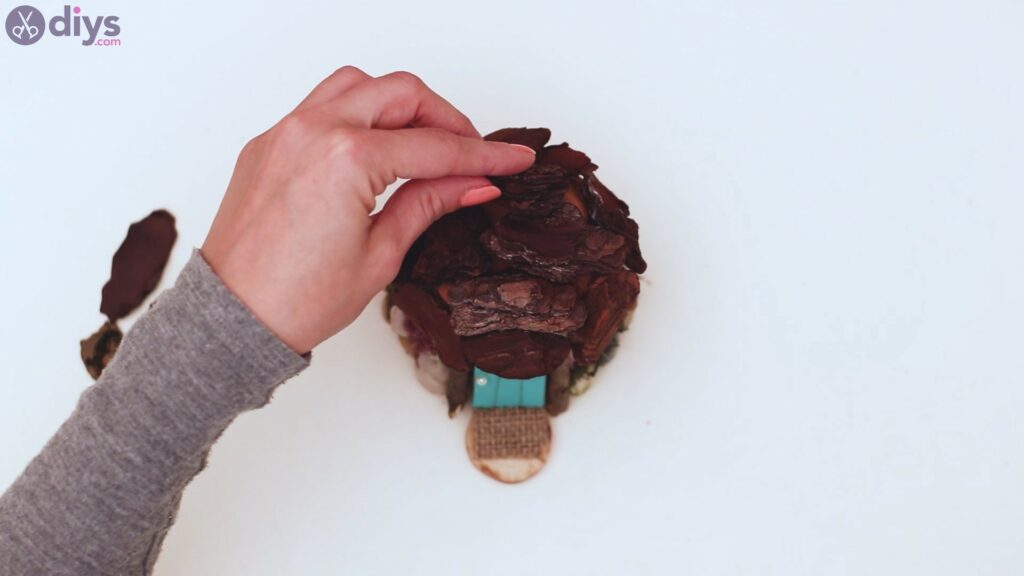
At present that the plate is glued to the pot, we need to make a roof out of it. Allow'southward get the tree bark and add information technology to the top of the house. Add together enough of hot gum to the plate and press the tree bark into it.
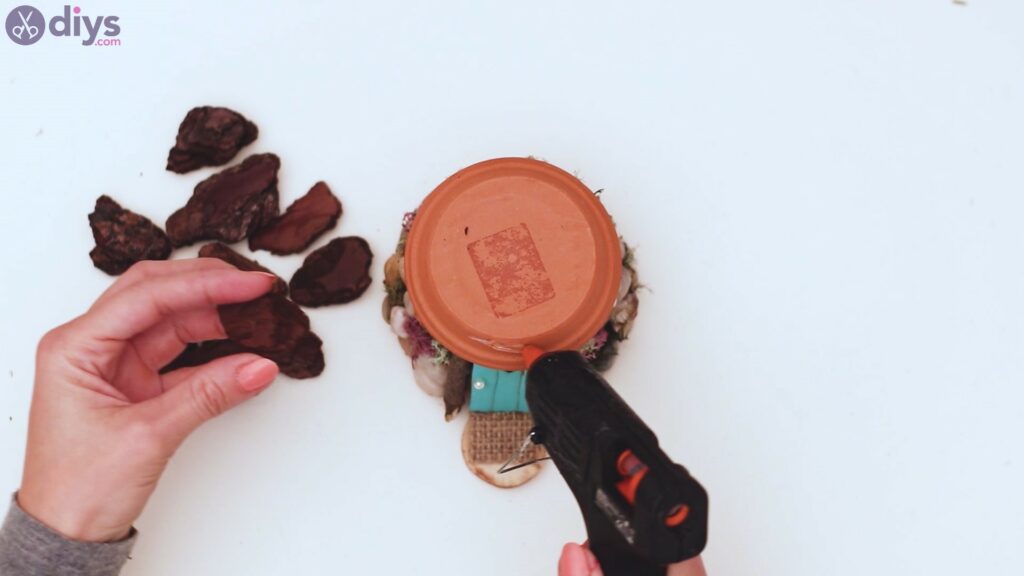
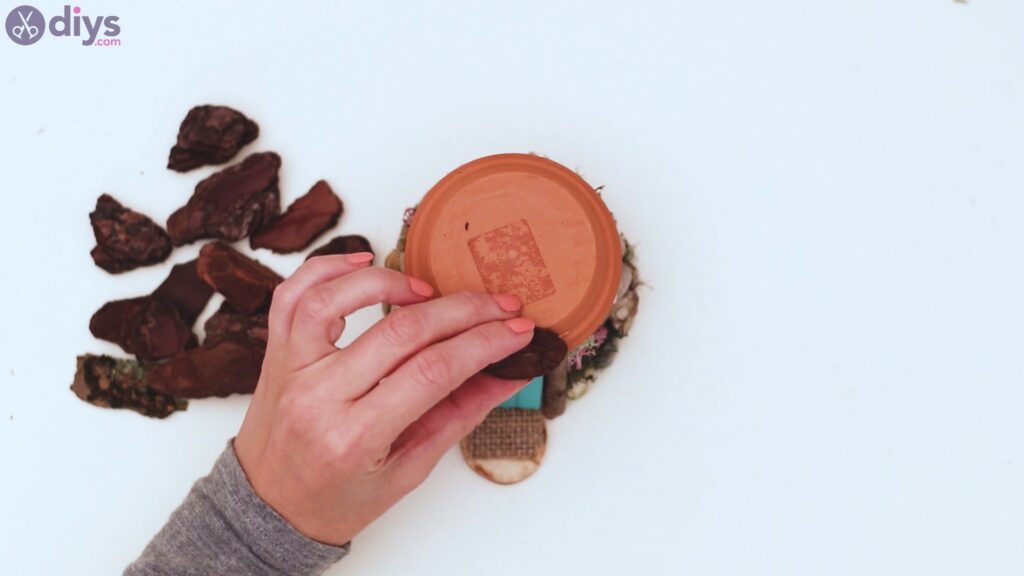
Go effectually the plate and go along calculation the tree bawl. This will make the tiny house await real and pretty, as well every bit natural.
Step 10: Decorate the house
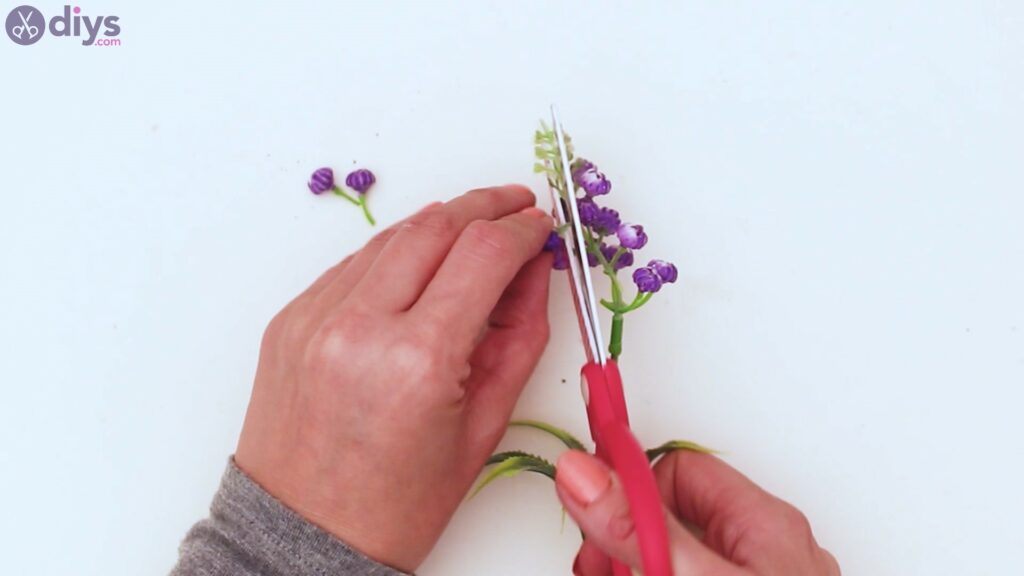
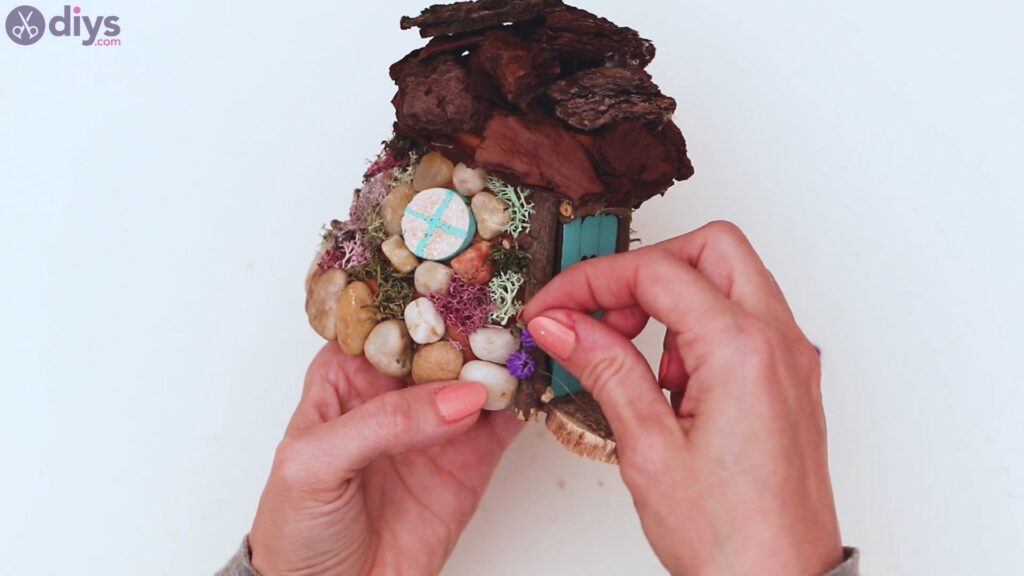
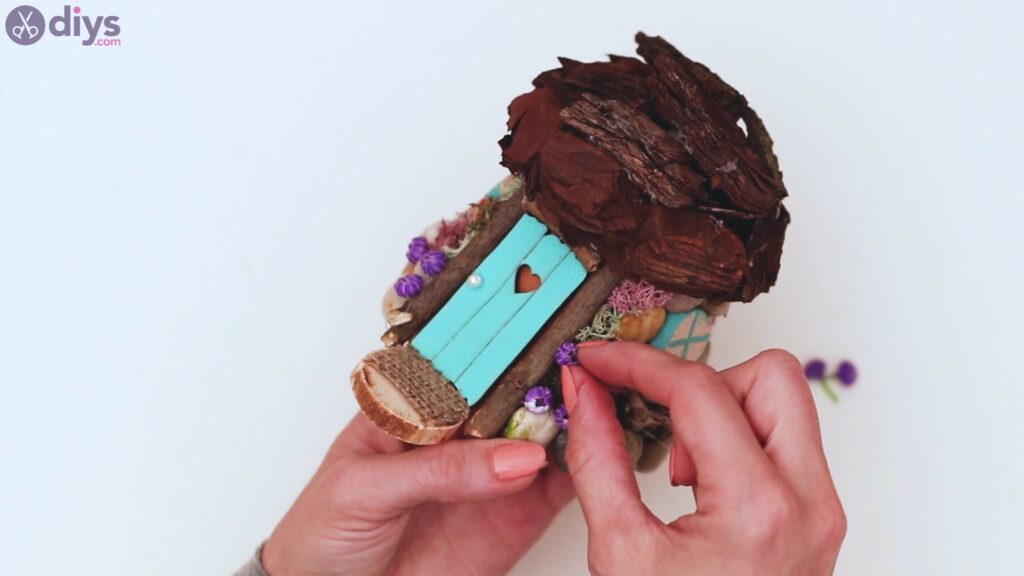
The house is almost washed, but we even so have some materials we didn't utilize. Become theartificial flowers and cut off some of the buds.
Dab more hot gum near the entrance to the house and press the artificial flowers into the area.
The spot of color will make the house look even more welcoming and pretty, and we so want that because it will arrive more highly-seasoned.
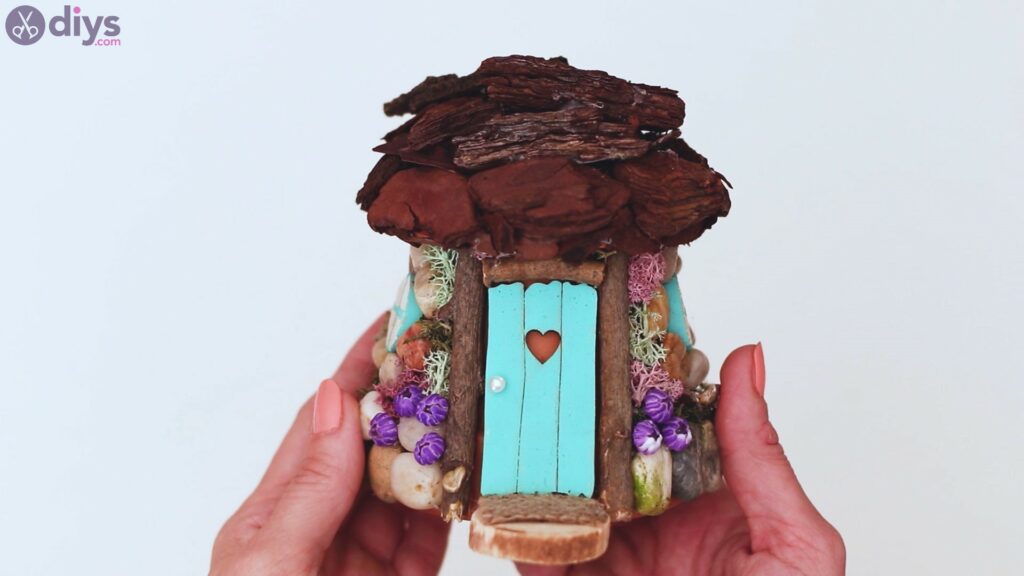
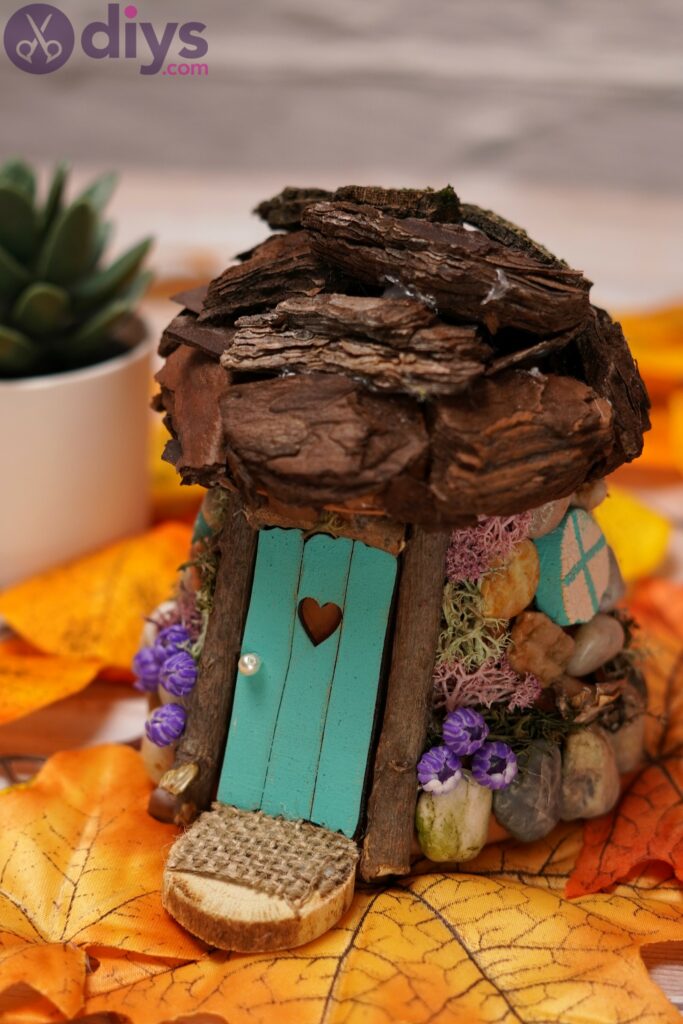
In that location nosotros go! It looks perfect and we feel similar a young family of garden sprites could motion in, correct? Jokes aside, it'southward a beautiful creation you can tuck between your flowers in the garden. Whether you made this for yourself or you're gifting it to someone, we know they'll capeesh it.
We'd love to see how your design turned out, and so reach out to us over social media and drop united states some pictures. Also, let u.s.a. know in the comments what you think of this design.
bernsteinchme1960.blogspot.com
Source: https://www.diys.com/fairy-garden-house/
0 Response to "DIY Tiny Garden House - How to Make a Cute Tiny Garden House"
Enviar um comentário